
")
Table of Contents
As you would expect from a full-time travel photographer, I spend a great deal of my time taking photos when traveling. That includes everything from landscape photography in remote locations, through to food, portrait, wildlife, event, and architectural photography in destinations around the world.
Over the years of getting shots on the go, I have become familiar with the unique challenges facing travel photographers, which make it more difficult to get the shots we may want on a trip.
In this guide, I’m going to share with you the most common challenges you might experience when taking photos while traveling. I’m also going to share my tips on overcoming these challenges, to help ensure you get great photos when you travel.
Challenges of Travel Photography
All photography has its challenges, but when we travel we often face additional unique challenges which can impact our ability to get great photos.
When you’re taking pictures at home, you are likely familiar with the local area, you know about any photography restrictions, and probably know the type of gear to bring. If you are driving from home, you may be able to throw extra gear in the car in case you need it.
You also often have some flexibility to plan around weather conditions and crowds. Plus, if things don’t work out as planned, you can usually just come back another day.
However, when we travel we are often unfamiliar with the destination, have restrictions on how much photography gear we can bring, be shooting in poor weather or lighting conditions, and have time limitations on how long we’ll be in any one place. So it can be important to plan ahead in order to minimize these challenges.
Here are what I’ve found to be the main challenges facing travelers looking to get great photos on their trips, as well as some tips and ideas for overcoming them.
Limited time in destination
One of the biggest challenges we face when traveling is that we tend to be on a timetable. Whether we are traveling for work or pleasure, the majority of trips have a defined end date, meaning at some point the trip will be over and we have to head home.
What does this mean to the traveler looking for great photos? Well, it means that you have to get all the shots you want within the time you have available to you.
To ensure you do get the shots you want, the key is careful planning. Without proper planning, you might miss the shots you want because you run out of time.
My top tips are:
- Research your destination in advance so you know what places you want to visit and things you want to do. You might want to make a list of the types of photos you want to take.
- If you have flexibility in terms of when you visit, you might want to research the best times to visit in terms of weather, crowds, and events. Timing might be particularly relevant for wildlife photographers as certain species may be much easier to spot during certain seasons for instance.
- Plan your itinerary to include all the locations you want to visit for your shots. Note any relevant opening and closing times for the dates of your visit. Make sure to make bookings for any locations, such as museums or national parks, that require reservations to visit.
- There are a number of apps that can helpful in planning such as Google Maps, Instagram, and The Photographers Ephemeris. Guidebooks, blog posts, and online local event calendars can also be useful.
- If you are traveling to a destination as part of a guided tour or cruise, then there will be a fixed schedule that you will likely not have any control over. In those types of situations, doing your research and planning ahead can be even more important as you’ll likely have little flexibility. Knowing the itinerary details and time allowed in each place can be very helpful in planning realistic photography goals.
- For any special photos, plan extra time in case you need to return to the location due to variables outside your control, such as bad weather at a landscape shoot or an unexpected closure.
- Be realistic about your time, and ensure you give yourself enough time for all the shots you want to get.
I cannot stress enough how important advance planning is for getting great travel photos. When you are in the destination you want to be spending your time enjoying the destination and taking photos, rather than researching things you want to do, photography locations, and local events.
The majority of your planning activity can be done in advance, and doing so will get you much better results once you are on location.
Variables that you have Limited Control Over
When we travel, much like when we are at home, there are some things that we just have no control over. These might include, but are not limited to, things like the weather, unexpected closures, attraction opening hours, lighting conditions, and so on.
When we are taking photos locally, we usually have the luxury of time and returning to a place if the weather is bad or an attraction closes unexpectantly.
However, due to limited time in a destination, variables like bad weather can often throw a real spanner in the works. And often we have to just take the best photos we can in the circumstances.
Poor Weather
Poor weather can really affect our photography plans. They can make it difficult to get nice shots, affect our gear and comfort, and even lead to unexpected closures of attractions.
Like we mentioned earlier, if you have the flexibility, we recommend factoring in the weather of a destination into planning when to visit, and ideally planning to visit when the weather is best for photography and travel in general.
This may be particularly important with destinations that are known to have extreme weather conditions like typhoons and tropical storms during certain times of the year.
When you plan, check to see what the weather will be like in general when you visit, and remember also to check an up-to-date forecast as your trip nears.
Regardless of how well you plan, things like the weather and unforeseen circumstances can still affect your plans. Once you are at your destination, you just have to do your best with the weather conditions that present themselves.
Be prepared – you will want to be prepared for a range of weather conditions, regardless of the weather forecast, as these are not always accurate. So ensure you pack appropriate clothing as well as any protective equipment for your camera like a rain cover. Consider factors including rain, heat, dust etc. when planning what you bring.
Be flexible – The best option to handle the variable that is weather is to be flexible where possible. If the weather forecast shifts, maybe you can change your schedule around so as to take advantage of any better days for what you want to shoot.
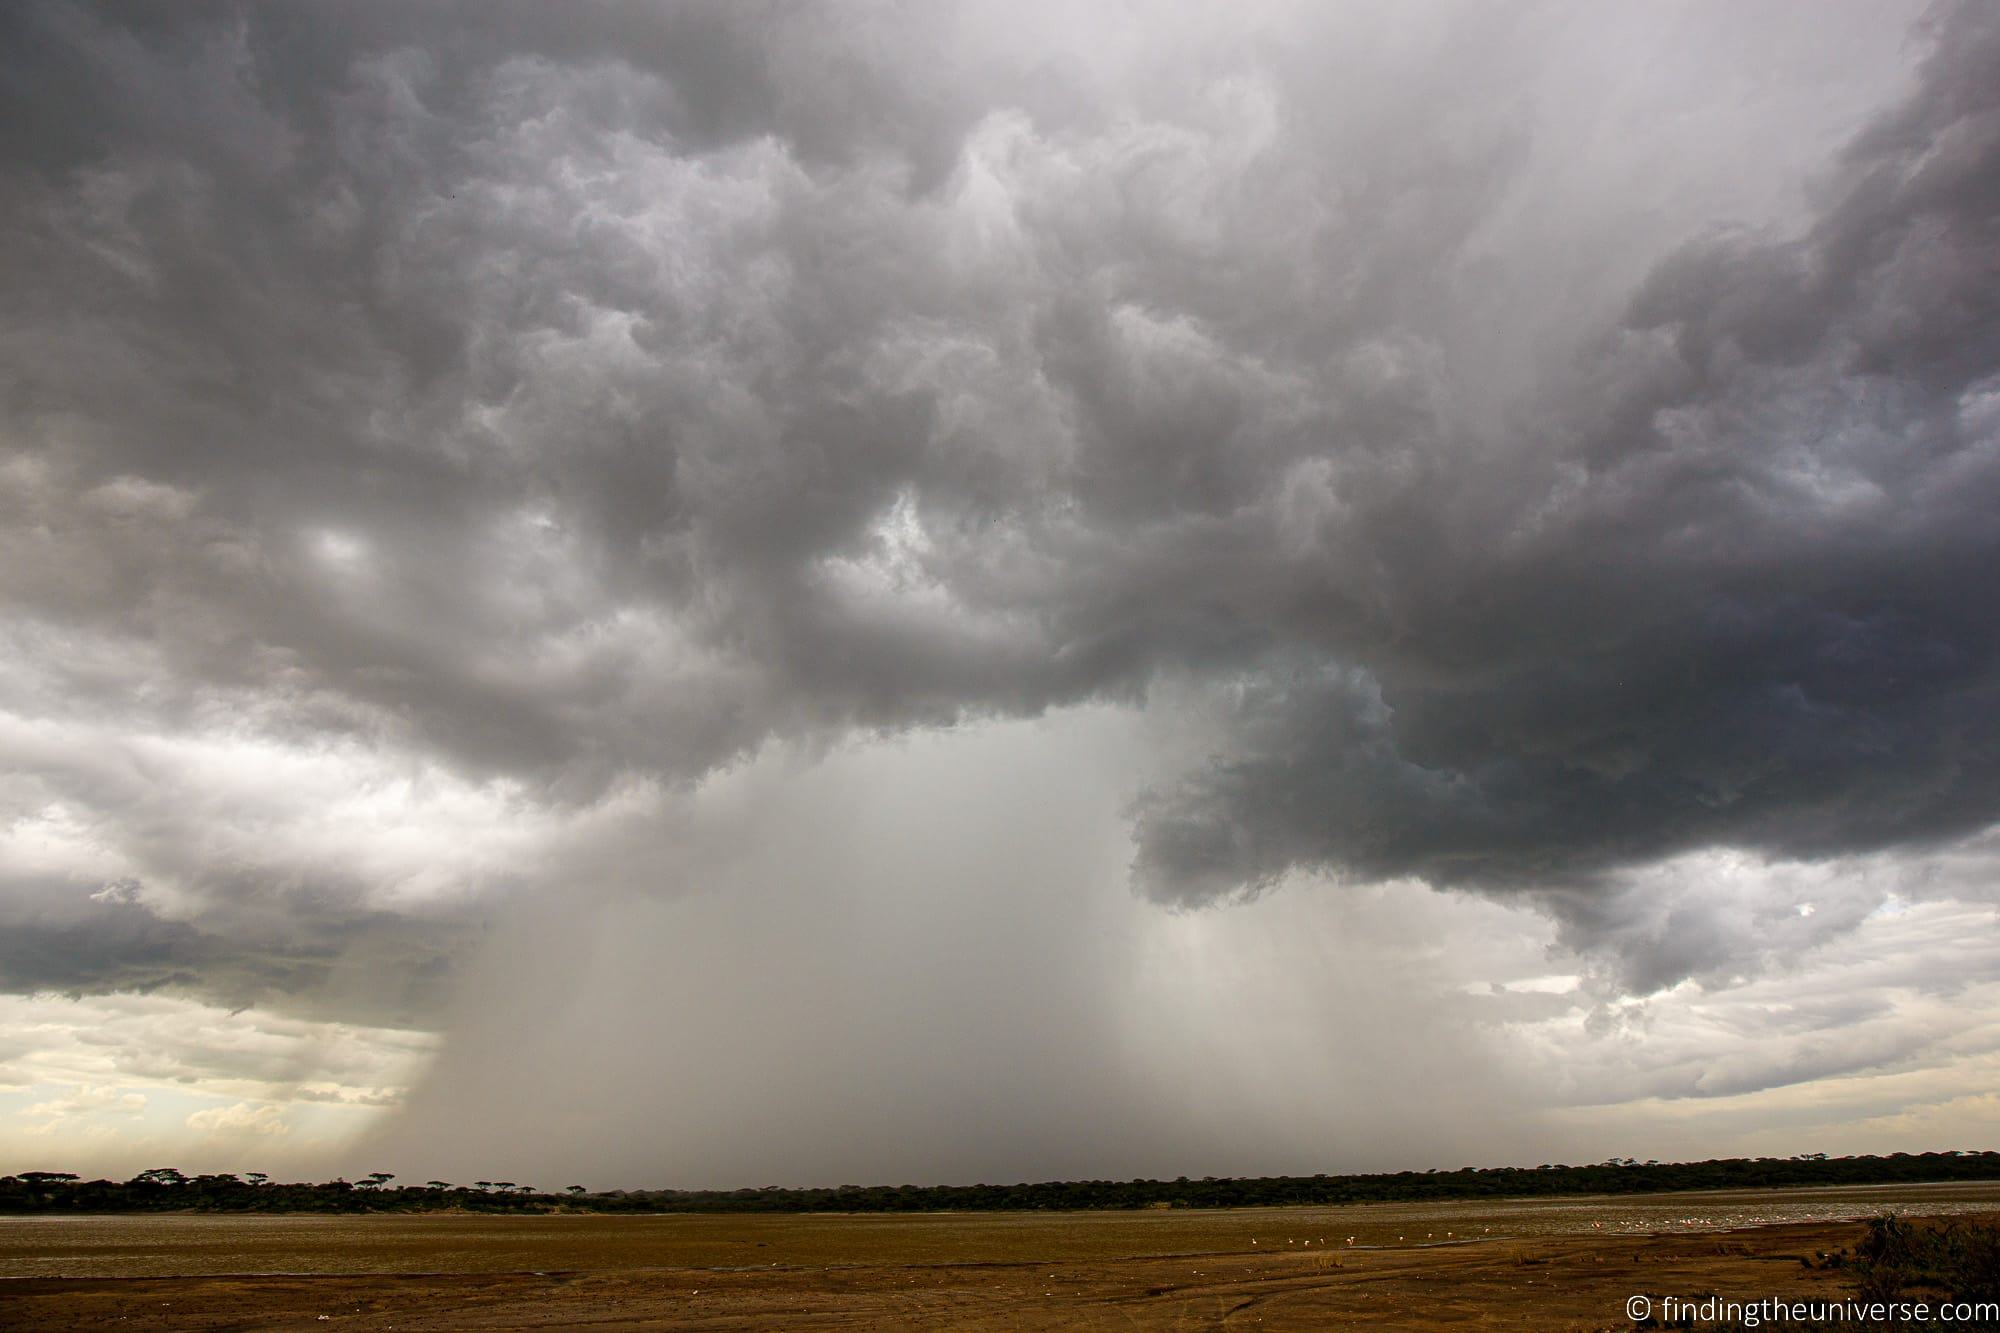
If you can’t be flexible, try to work with what you have rather than giving up. You might have dreamed of a glorious blue sky and fluffy white clouds, but dramatic storm clouds might also work well in the scene.
Or, switch it up entirely, and switch your subjects. For instance, instead of shooting landscapes, focus on wildlife, people, indoor locations, or other types of images which are less weather dependent.
Finally, remember that you came on the trip to enjoy yourself, and don’t waste energy feeling bad about the shots you missed. Just enjoy the trip, and get the photos you can.
Crowds and Events
One thing that you are likely to encounter in any popular destination is crowds of people who are wanting to visit the same places as you. In terms of photography, this can make it challenging to get good photos of certain things without people in them.
One tip is to of course to plan to visit at a less popular time of the year. But even if you can do this, you are often still going to have to encounter lots of busy places.
You may also find yourself visiting when a popular event is going on, so even though you thought you were visiting at a quieter time, there are more people in the destination.
For example, if you visit Albuquerque during the International Balloon Fiesta, you are going to find most attractions are going to be a lot busier than you might expect for October in this part of the world.
As you plan your trip, first check when the most popular time to visit the destination is. This might for example be during school holidays or other national holidays, and might affect how crowded specific locations are.
Also check when there are major events happening in the destination. These might be events you want to shoot, or events that affect things like opening hours or how crowded a destination is.
The good news is that it is possible to overcome the challenges of visiting a popular destination.
First, plan to visit places when fewer people will be there such as the early morning or later in the evening. If shooting outside this can often be a better time of day for the light as well, so you will get better images as well.
Next, even if it is busy, be patient and just wait for opportune moments. Often a crowd of people will ebb and flow, and you might have moments when a location appears to be empty even at busier times.
Another option for a popular attraction is to book a special tour which allows you to visit privately or as part of a smaller group (e.g., this Vatican tour we did).
If you don’t mind doing some editing, another option if you can’t get around the crowds is to take the photos and then edit the people out of the shots later. This takes time and skill but programs like Photoshop can help you do this with a lot of photos. You can also use neutral density filters so the people blur out with a long exposure.
Finally, instead of trying to fight the crowds, you might embrace the people and use them in your shots as part of the story.
Attraction Hours & Unexpected Closures
One limitation you will often find when you travel is that many places only allow you to visit during a set of hours. Some places may only be open a very limited time. And sometimes you’ll find unexpected closures as many travelers did across the world during the COVID-19 pandemic.
You will want to do your research ahead of time so you can maximize the time you have. Check opening hours and dates (and re-check them before your visit), and check local events and holidays that may affect opening hours,
Many people also miss out on visiting a place because they didn’t make reservations and arrive to find out that tickets are sold out in advance. Be sure to plan ahead and know if you need to pre-book an attraction or not.
You may also consider having flexibility in your schedule in case you need to return due to an unforeseen closure, especially if it’s a location you really want to get a photo of.
It’s also a good idea to have back-up plans for other places you’d like to visit in a destination in case your plans need to change.
Sometimes there will be situations you can’t get around, like a last-minute closure, that prevents you getting the shots you want. It can be useful to have a fall-back list of things you want to shoot, should this occur.
Poor Lighting Conditions
One thing you are likely to encounter on your trip is poor lighting conditions.
While this may be a factor for outdoor night shots, you’ll also likely experience poor or unflattering light in museums, restaurants, religious buildings, and other indoor venues.
You’ll also likely find yourself trying to shoot through glass, whether at a viewing tower or inside a museum.
The best thing you can do is to be prepared for this by knowing how to use your camera to its best ability in low-light conditions.
In general you’ll want to understand the key elements of the exposure triangle like ISO and aperture. If possible, you should also check out if you can use a tripod or flash, as this might resolve your lighting issues.
Here are a few tips to help you get better photos in some specific situations.
Getting better results with poor lighting
You will often find poor lighting inside a museum or restaurant. In this scenario, try to find the locations inside the venue with as much light as possible.
For example, in a restaurant pick a table close to the window if you can, to maximise the light available. In a museum, look for subjects which have lots of light.
If you are shooting inside a building where tripods are permitted, use one so you can use a longer shutter speed. Flash photography, if allowed, might also work to improve your images in some situations. For food photography, consider using the light in your smartphone to illuminate your food and give better results.
Shooting through glass
Many museums and viewing platforms require you to shoot through glass. This can introduce unwanted reflections that detract from the shot.
In these situations, you want to hold your camera as close to the glass as possible, ideally directly against it, which will cut back most of the reflections.
When shooting through glass make sure to disable your flash as this will just reflect off the glass and exacerbate the problem.
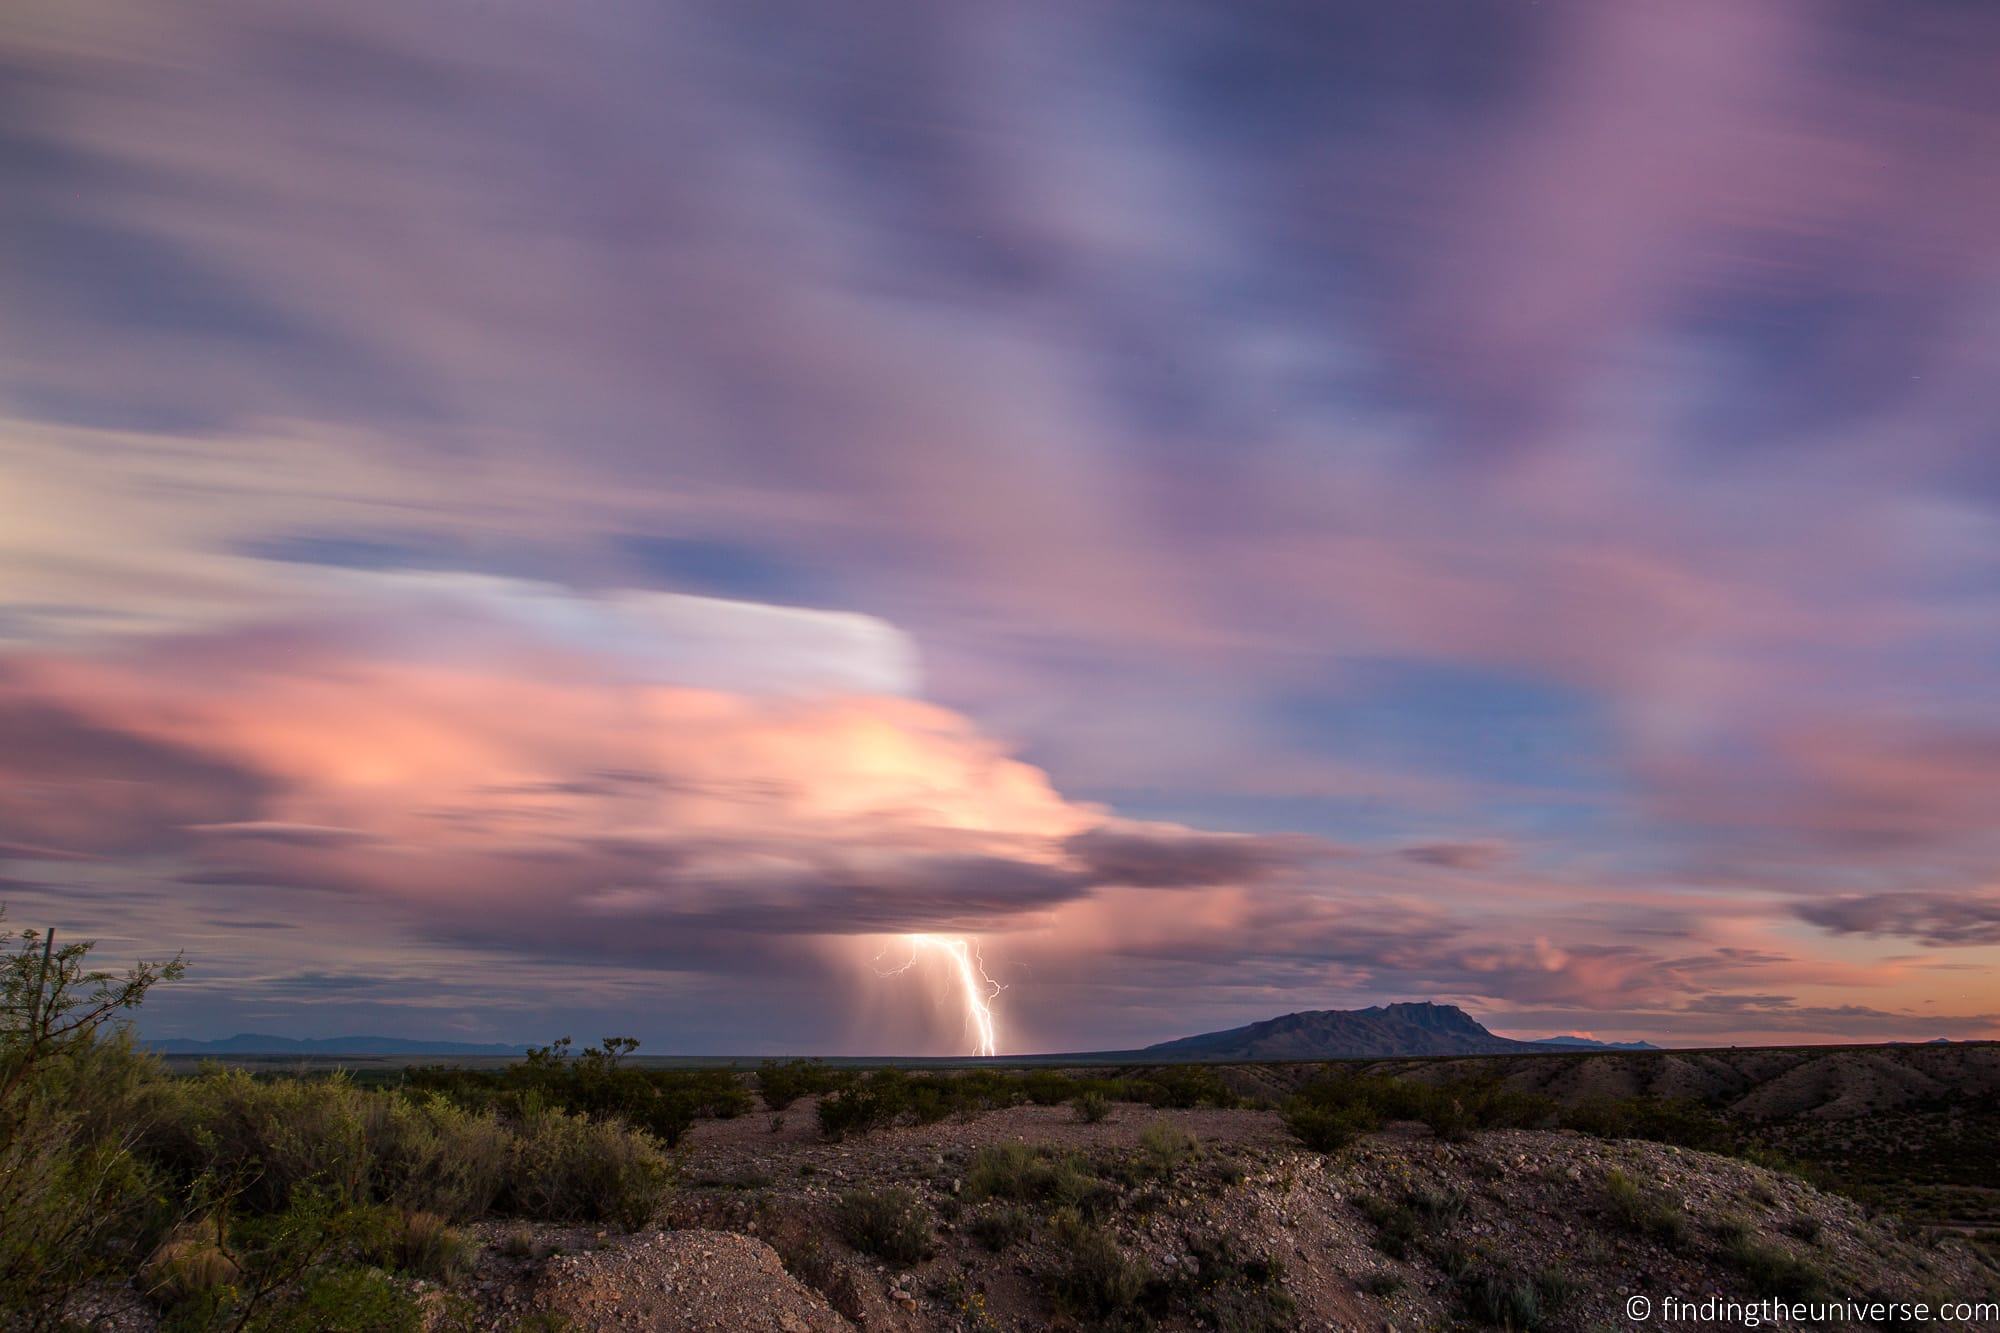
Outdoor evening conditions
When shooting outdoors at night there is normally less light available. The best way to get around this if possible is to use a tripod, as this will let you use lower ISOs and slower shutter speeds.
Of course, depending on what you are photographing, a lower shutter speed might not work. For a moving subject for example it will just result in a blur.
In these situations, ideally you’ll want a lens with a wide aperture and a camera with good high ISO performance. Then you can balance aperture and ISO to get the best results based on what you are shooting.
Safety Concerns
It is also important to check on any local security concerns and tips for staying safe in a destination. Local security concerns may affect the camera and photography equipment you choose to carry if there are heightened concerns related to theft, robbery, and other types of crime.
In some places around the world, it is not recommended to carry a big camera or display expensive equipment. knowing about these things – for instance we sometimes just carry a compact camera we can fit in a pocket or purse in places where we’d been advised not to carry a mirrorless or DSLR camera.
Limitations to how much gear you can take with you
One big difference between shooting around your home location and when on a trip is that you will likely have less photography gear available to you.
The amount of gear we take is often limited by the luggage allowances on our chosen method of transport whether that be airplanes, coaches, trains, cars, or ships.
This will of course vary depending on how much gear you have. If you only have one camera and a couple of lenses, then you may be able to travel with all your gear.
However, if like me, you have a collection of camera lenses, camera bodies, and accessories like tripods, then you will likely have to decide exactly what to take with you on a trip, and what to leave behind.
The first thing to consider is what is your luggage allowance. Be sure to consider whatever situation is going to have the strictest size and weight limits.
For instance, you may have fairly generous luggage allowances on an international flight but have much more restricted allowances on a safari plane or a tour bus. On a road trip, you may have more allowance and just be limited by your trunk size.
It is obviously difficult to get around restrictions like this. The main thing is to know what you plan to take photos of, and select your gear accordingly.
If taking a flight, you should consider if you are OK with packing your photography gear in the airplane’s checked hold luggage or want to ensure it can all fit into your carry-on luggage.
I personally never pack my camera body or lenses in the hold luggage on a plane or bus, opting instead to take it as carry-on. Most airlines have quite strict size and weight limits for carry-on luggage, so ensuring I stay within those requirements is obviously important to ensure I get to board the plane!
Next, you want to choose your gear based on where you are traveling and what types of photos you plan to take. Is your focus wildlife, landscapes, family photos, food, architecture, water sports, etc.? This is particularly important in selecting the type of lenses (if you have a mirrorless or DSLR camera) and photography accessories that are going to be the most useful.
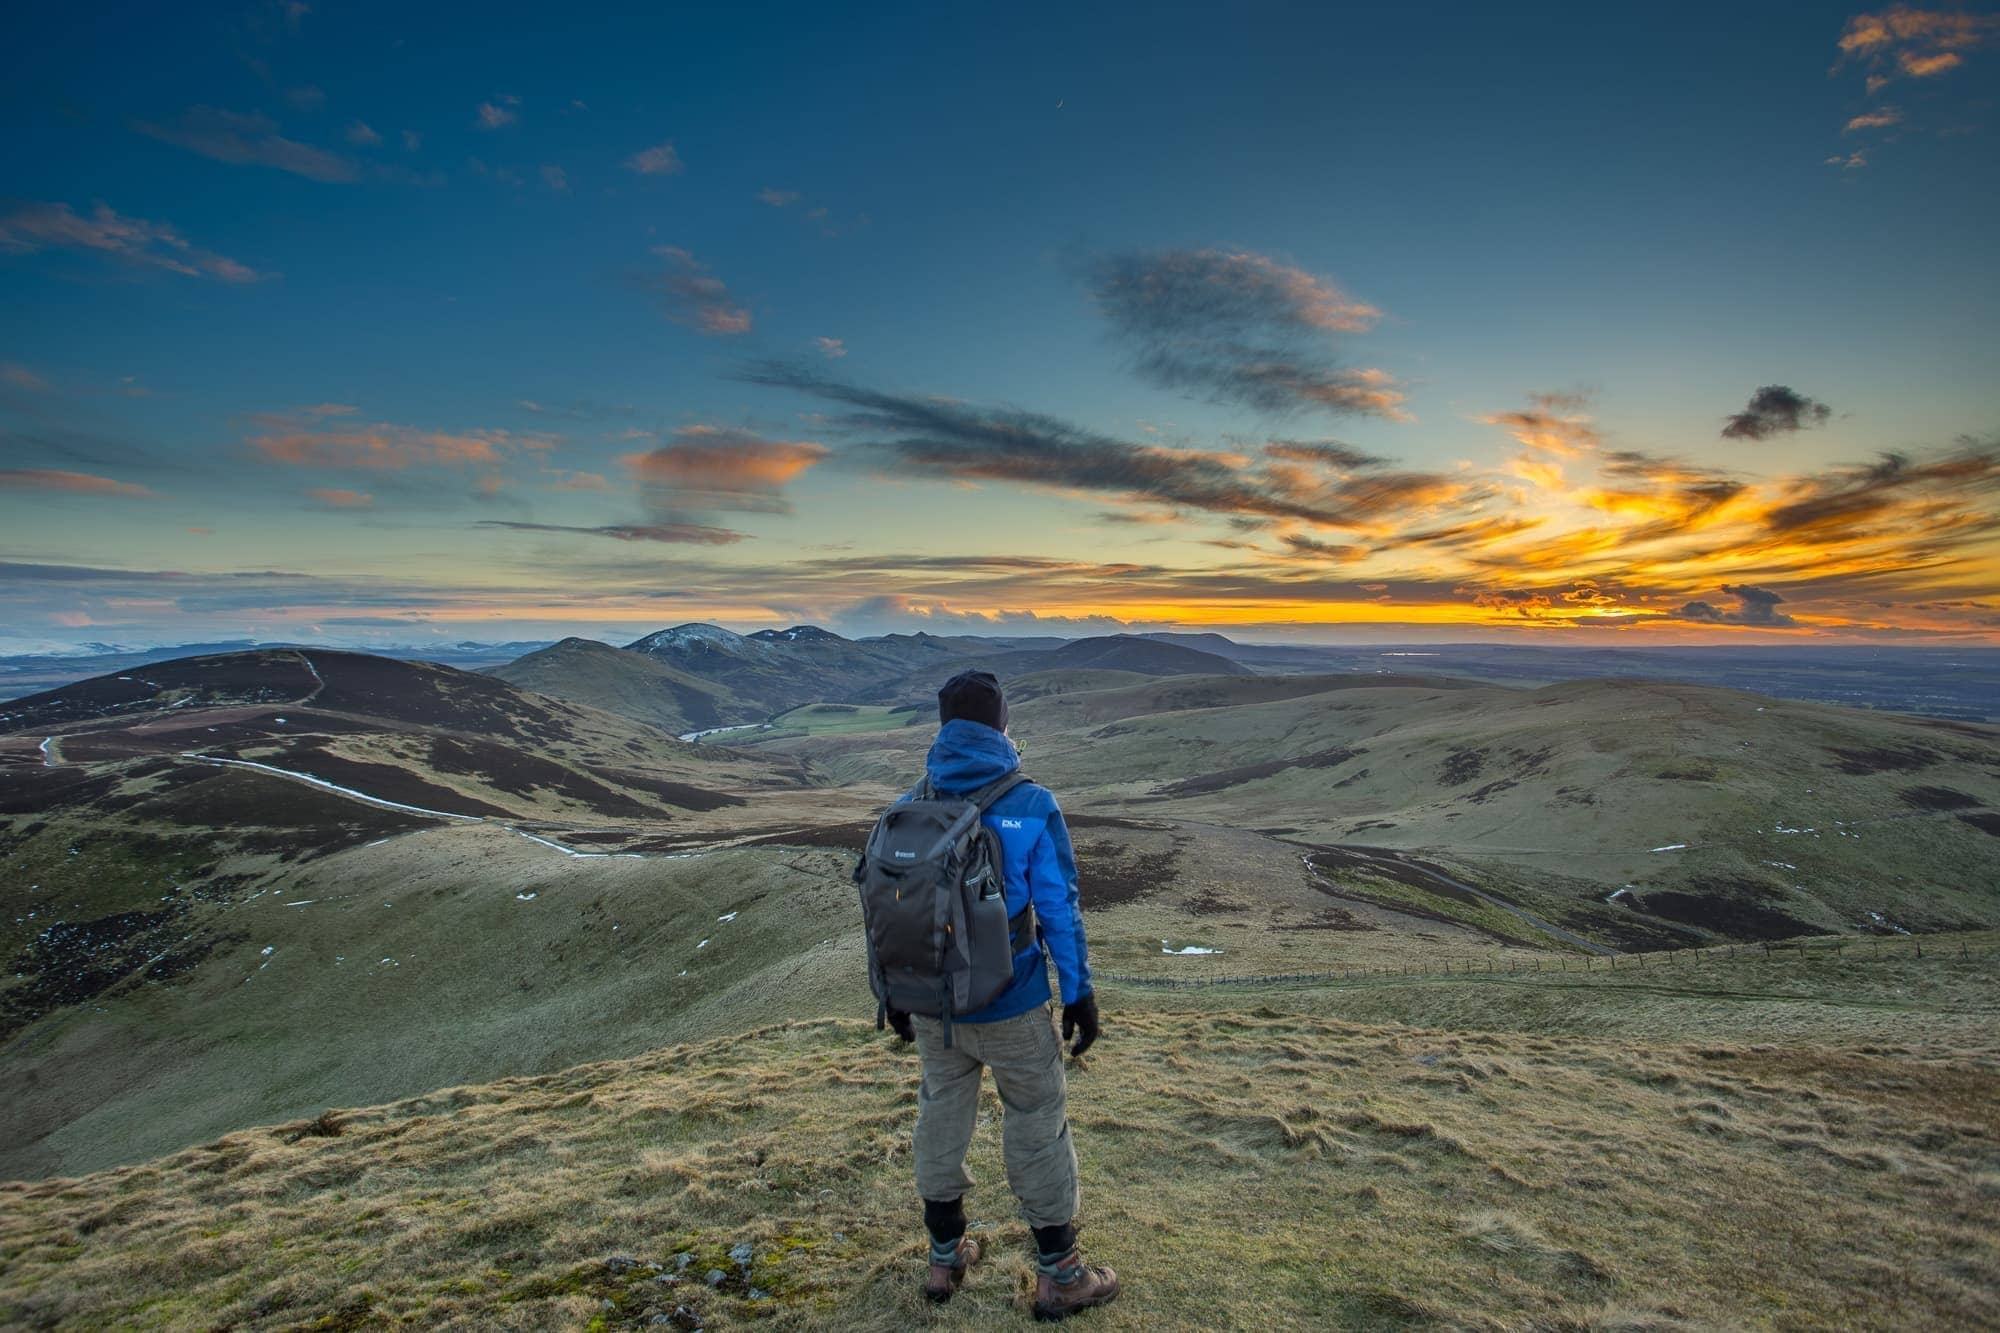
For a trip where you will be taking images of landscapes, then you will likely want to pack a wide-angle lens. Ideally, you might also consider a set of ND filters, and a travel tripod.
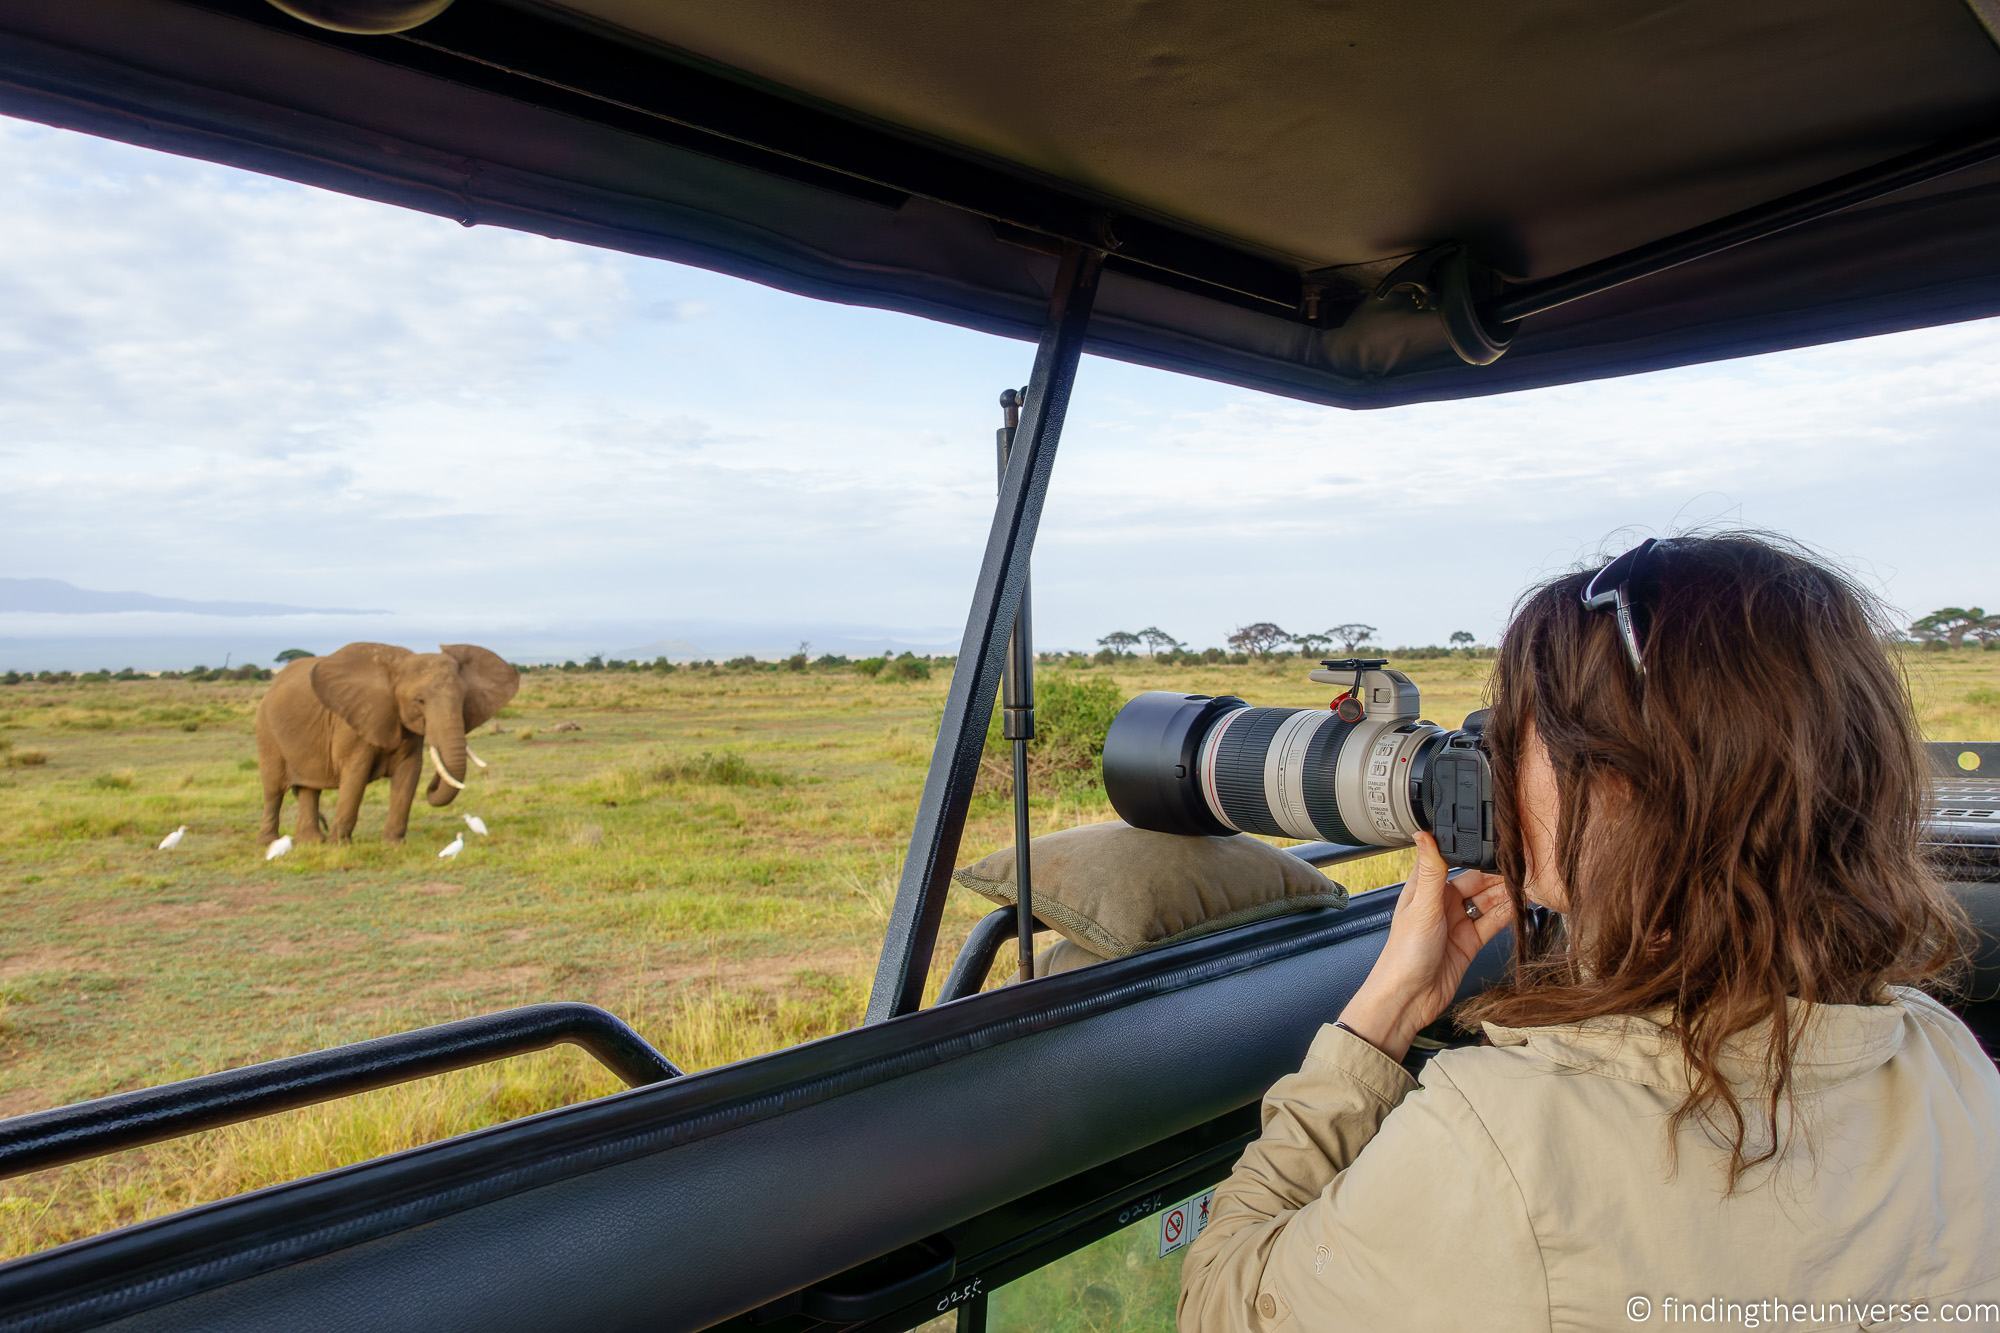
For a wildlife focused trip like a safari, then you’ll probably want a nice big telephoto zoom lens and a monopod.
Of course, the reality is that most trips tend to involve a variety of photography subjects which might include everything from wildlife to landscape to people to food.
As such, you’ll want to pick gear that covers everything you want to photograph. It also has to be gear which you are happy to carry with you in terms of weight, which meets any luggage restrictions, and which meets your budget if you are looking to buy for your trip.
I’d suggest reading my guides to the best travel camera and the best travel lenses for some tips if you are planning a purchase.
When planning for a trip, I nearly always have to plan my gear based around the limitations of my transport. Whilst a road trip in my home country allows me quite a lot of flexibility, an overseas trip with a flight normally restricts me.
For most travelers, I recommend trying to travel relatively light and to pick lenses that offer the most versatility. In my case, that’s invariably a wide-angle lens for landscape, cityscape and astrophotography work, and a telephoto lens for wildlife and portrait.
Normally I use and recommend zoom lenses rather than primes for the versatility they offer, although this decision is of course personal and depends on what you want to shoot.
For example, if I’m visiting a destination where there’s minimal chance of wildlife photography, then I might pack a prime portrait lens rather than a big heavy telephoto zoom lens that I’m unlikely to use.
The same principles apply to accessories. Whilst I am a bit more relaxed about packing things like tripods in hold luggage, I still only want to bring it if I’m likely to use it. As always, planning is key.
Don’t forget to pack extra batteries and memory cards as these will ensure you can keep on shooting even if a battery goes flat or a memory card fills up or fails.
Familiarity with Equipment
When I travel, I often see others struggling and having a hard time getting the type of shot they want. They may have a new camera or tripod, be using their equipment for a type of photography they’ve never done before, or just have little practice with their equipment.
The best thing you can do before your trip is learn as much as you can about your camera, basic photography principles like the exposure triangle, and get in lots of practice at home before your trip. Trying to learn as you go can be frustrating and wastes your limited vacation time.
If you’ve recently bought some new equipment for a trip, or only normally use your camera when you travel, then a lack of familiarity with your gear can cause issues when on the trip. This can also be the case if you rent your equipment in advance of a trip, which is common for situations like a safari, where you might need a specific piece of equipment you wouldn’t otherwise want to invest in.
For gear that you already own, my recommendation is that you read the manual and then practice with it on a regular basis. Photography is a skill, which we can improve with practice. It’s also a skill that can get a bit rusty if we leave it for a while.
Whatever camera you plan to travel with, be it a smartphone or a high-end mirrorless camera, it’s important to understand how it works and how to get the best out of it. You don’t want to miss a shot on a trip because you’re trying to remember how to change focus modes or adjust a setting like the shutter speed.
It is definitely a good idea to get into the habit of taking your camera out with you and using it on regular basis, even if only for practice. Not every photo has to amazing, the main thing is to know how to get the photos you want with the equipment you have.
You don’t need to go some place exciting to practice your photography. The birds in your garden and your neighbor’s cat can help you learn how to shoot wildlife. You can practice food photography at home with your own meals. Wander your local town or city for practicing architectural photography. Shoot landscapes along a local hiking trail, scenic viewpoint, or country park. Your kid’s soccer game can help you practice action and sports photography. Practicing at home means you will have more skills and experience to take better photos on your next trip.
If you are looking for some help and guidance, there are lots of resources online that can help. I personally run an online photography course for example, and I’ve helped over 2,000 people to date improve their photography. But there are plenty of resources out that, from local classes to online guides that can help you learn and challenge you to keep practicing.
If you are renting equipment for a trip, then it can be a good idea to ensure it arrives a bit in advance so you have time to check it is all in good working order, and also to practice with it a bit so you are familiar with it. I’d also recommend reading some online guides and the user manual in advance of receiving it, so you can hit the ground running when it arrives.
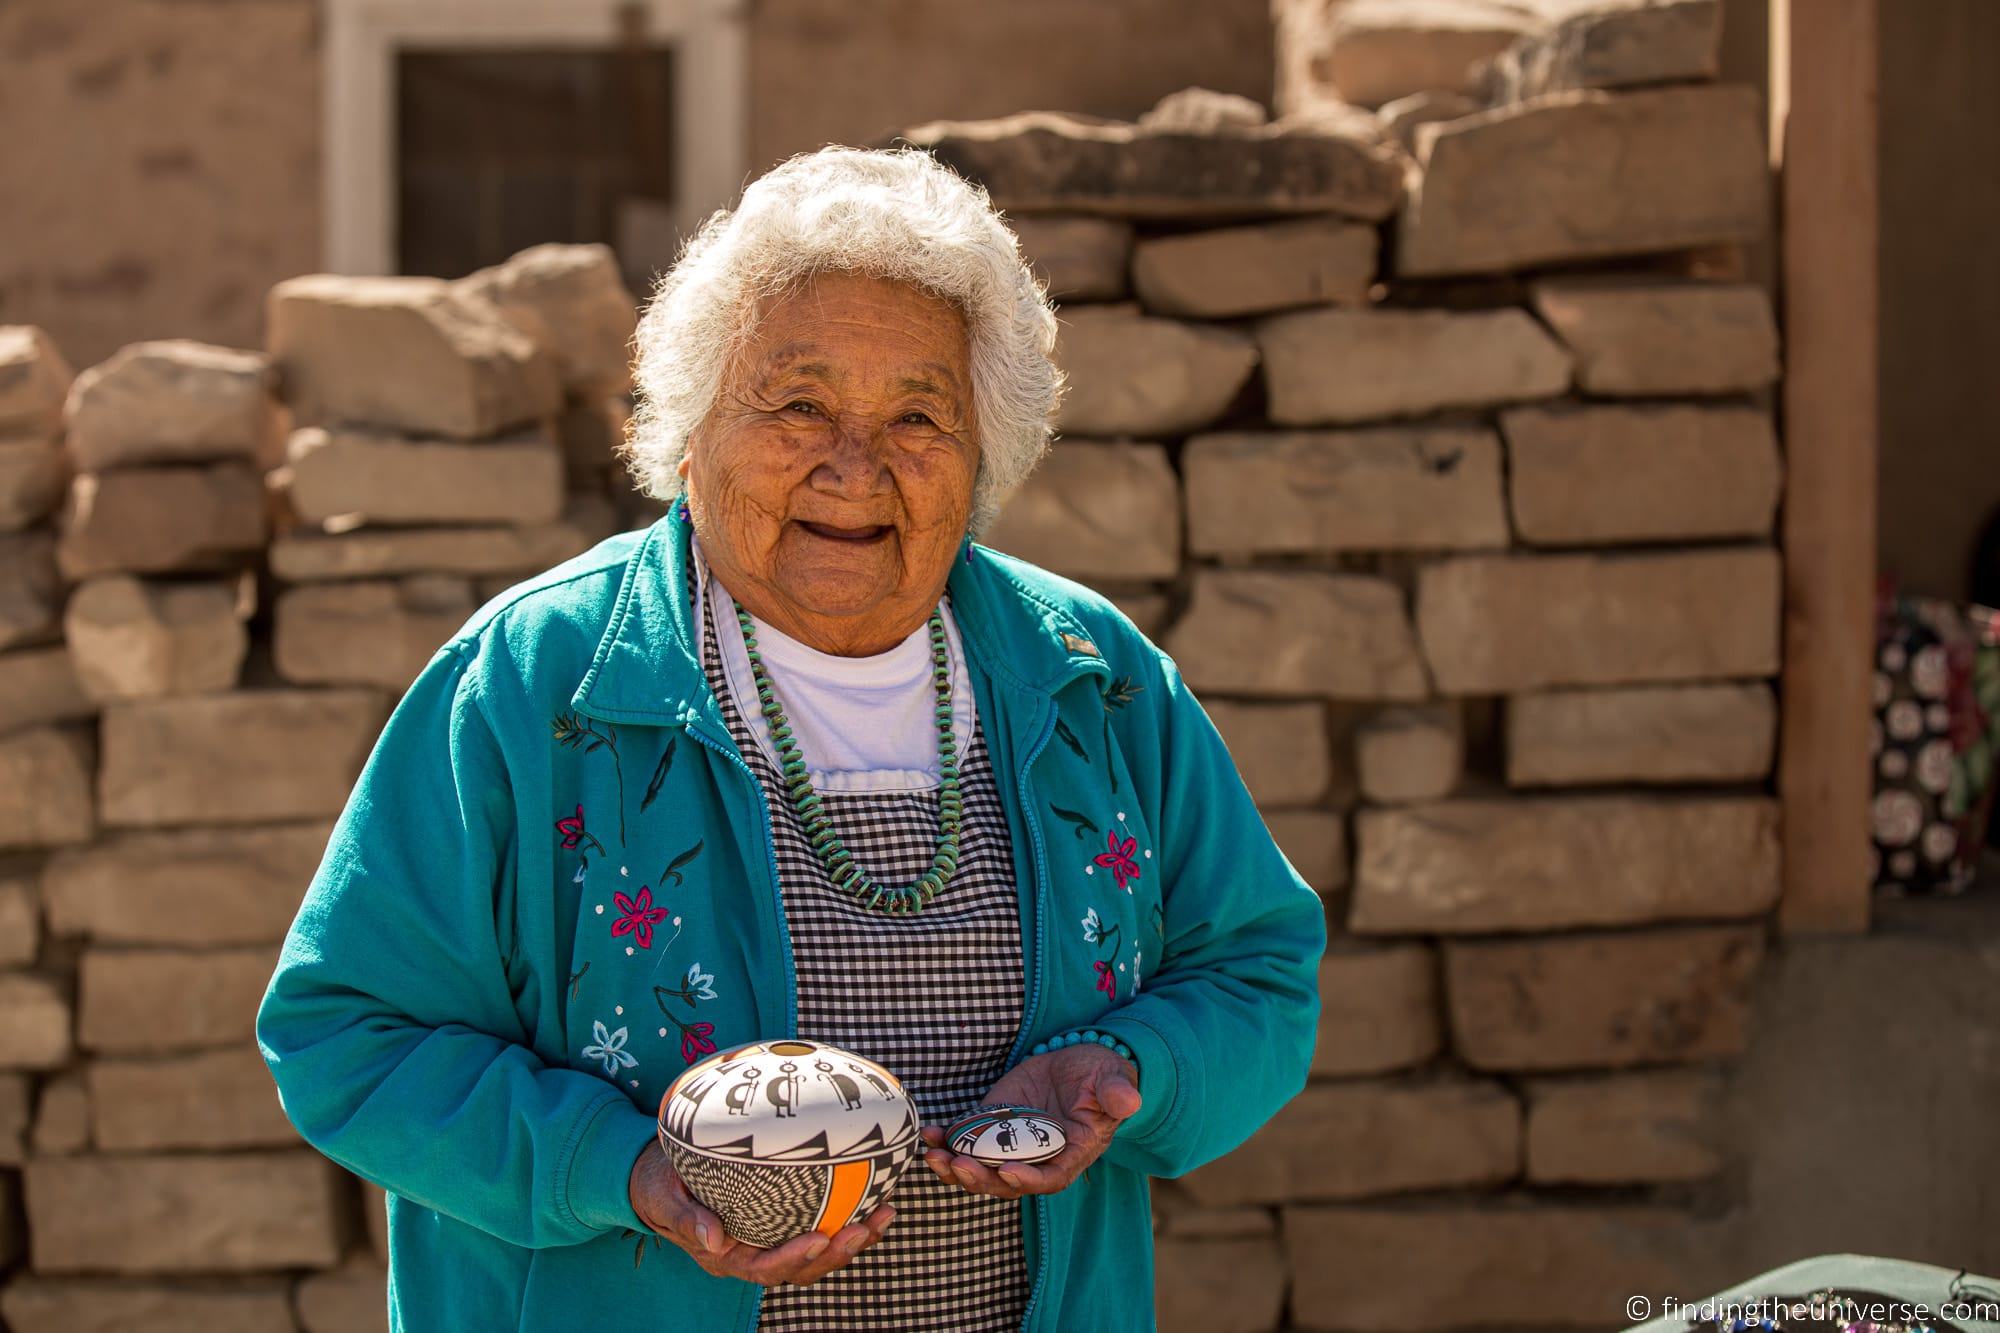
Taking Photos of People
Often when we travel we want to get photos of the people in the destination. This might be going about everyday life, such as in a market or other street scene, or during a more special event like a festival or cultural show.
The challenge of course is that not everyone likes to have their photo taken, and you obviously don’t want to upset anyone. There’s also the issue of privacy, which varies by country.
Knowing local privacy laws and customs is particularly important if you are planning to publicly share your photos. While it often is legal to take photos of people in public in most situations, it may be illegal to share, publish, or sell those photos without the person’s permission.
Generally, for non-commercial use, most countries allow photography in public spaces. However, the rules vary by country and jurisdiction. For example, Japan has fairly strict privacy laws. Wherever you travel you will also want to be particularly careful when taking photos of children as there can often be stricter rules compared to photographing adults.
In my experience, the best places to get photos of people are at public events such as festivals, where performers and the crowd normally have an expectation of their photo being taken. Of course, you will still need to check if there are any regulations in place regarding photography.
Another good option we have found for photographing people in a destination is to start with communication. It’s a lot easier to ask for someone’s permission for a photo if you talk with them first.
For example, if you want to take a picture of a market trader at a stall, if you chat with them about their products and buy something, then they will be much more likely to be willing to have their photo taken.
The main thing really is to ask for permission. The worst thing that can happen is that you are turned down, in which case you can move on. Not everyone likes to have their photo taken and it’s important to respect that.
How Much You Can Carry
When we travel, obviously we have to consider our mode of transport when it comes to selecting the photography gear we plan to take with us.
However, it is also important to consider how much you are physically willing to carry. Even if you are traveling from your home on a road trip in your own car, you are still going to need to actually carry your chosen camera gear from wherever you park your car to where you are taking pictures.
How long will you be carrying your camera each day? If you are going to be headed out to explore a city in the morning and not returning until evening to your hotel, do you feel OK carrying your equipment around all day?
If getting to those locations for the shot requires a bit of a hike, then you definitely need to consider the gear you are going to carry.
For example, instead of a heavy tripod, you might invest in a lighter travel tripod. Instead of a wide selection of lenses, you might carry only one or two lenses you are certain you will need.
You might also consider investing specifically in a camera for hiking or backpacking, if that is something you do a lot.
The main thing is to consider carefully the total weight of the equipment you are planning on bringing, as well as anything else you will be carrying with you when out and about like snacks or a drink. If it seems too heavy to carry, consider cutting back a bit so it is a manageable size that you will actually carry.
It is best to be honest with yourself and if you know you won’t lug your mirrorless camera around a city, it is better to just bring your smartphone and learn how to get the most of it rather than bringing along a camera you won’t use. After all, bringing photography equipment that you end up not using isn’t a worthwhile endeavour!
Photography Restrictions
Different destinations and locations will have different rules around what is and what isn’t allowed when it comes to photography. It is best to check these before visiting so that you will be prepared and can plan ahead.
It is important to note that there are a number of museums, religious buildings, palaces, government facilities, and other attractions that forbid photography all together. Some may not even allow you to bring in your camera so you will want to know this to see if there are on-site lockers available or if you will need to leave your camera at the hotel.
While most places in the world do allow photography, there are often restrictions of some kind related to photography. There are quite a few things to look out for, which can impact the photos you are able to get. Some common restrictions to look out for include the following.
- Tripod limitations at events and inside buildings. A tripod can be a great aid to photography, but they can also be a trip hazard and interrupt the flow of people, so many locations prohibit their use. If the majority of locations you plan on shooting don’t allow them, save some weight by leaving it behind.
- Drone restrictions. The rise in popularity of drones for photography has opened up a range of creative possibilities, but also an increase in legal restrictions around their use. Many locations, and even some countries, totally forbid the use of drones. Others have strict rules in place for their use and may require you to get a license. Don’t risk a hefty fine, always check the rules before you visit to ensure you are flying legally
- Security restrictions. Many locations around the world prohibit the use of photography of specific buildings or locations for security reasons. For example, government, military and financial buildings may not allow photography, even of the building exterior or surrounding property. Normally this will be clearly marked, but if in doubt it is always best to check in advance.
- Flash restrictions. Lots of attractions, especially indoor attractions with artwork, will restrict the use of flashes for photography. Many cameras, including smartphones, will automatically enable the flash if there isn’t sufficient light for an image, so knowing how to disable your camera flash is key so you can take photos without breaking any rules.
As you can see, there are quite a few different restrictions to be aware of that might impact your ability to take photos, or to use specific accessories like tripods or flashes. So do check in advance of your visit as you might save yourself bringing equipment you won’t be able to use.
On the flipside, you might assume a location doesn’t allow a photography accessory like a flash or tripod, and then learn that it does! This was the case when I visited Carlsbad Cavern in New Mexico, and to my delight when we visited tripods were allowed. I was glad as it meant I was able to get much better images in the low light conditions.
You can also plan your visit to get better results. For example, many museums have natural light, so if you visit in the middle of a sunny day there may be more light available compared to visiting when it is dark outside.

Travel Companions
If you are traveling with other people, you will want to make sure that your goals for the trip align so that everyone has a good time.
We all want something different from travel. If you are planning a photography specific trip with someone who doesn’t really enjoy photography for example, it is likely that you will have to reach some compromises between you so you are both happy.
As a common example, for landscape photography it is not uncommon to want to be out and about at sunrise and sunset. However, depending where you are in the world, the sunrise might be very early, and the sunset might co-incide with an evening meal time.
The key to a successful trip like this is communication. You and whomever you are traveling with need to make it clear what you want from the trip, and work on a plan together that ensures you all have a good time. So perhaps you skip the sunrise some days, or plan to go out on your own on those mornings and meet up for breakfast.
Of course, another option is to travel solo. Whilst Jess and I normally travel together, I have taken some trips on my own where I have wanted to get specific shots. For example, I did a seven-day winter trip to Finland to photograph the Northern Lights.
Jess loves Finland, but as we’d been before and I was visiting with a plan to stand outside in freezing temperatures for multiple nights on my own, we agreed we’d both likely be happier if I went on my own!
Finally, if you would rather travel in a group and still focus on photography, consider taking a specialist photography tour. These exist for destinations around the world, and will allow you to get great photos and travel with like minded individuals.
See this list of photography tours around the world for some inspiration.
Further Reading
That’s it for my guide to overcoming some of the most common travel photography challenges! If you found this useful, you might enjoy some of my other photography related content. Here are some articles to get you started.
- Thinking about going on safari? See our guide to the best cameras and lenses for safari for some tips on what to take. We also have tips on getting great photos on safari
- If you’re in the market for a new camera in general, we have a detailed guide to the best travel cameras, as well as specific guides for the best cameras for hiking and backpacking, the best compact camera, best bridge camera, best mirrorless camera and best DSLR camera. We also have a guide to the best camera lenses.
- If you want a camera or lens, but the prices are a bit high, see our guide to where to buy used cameras and camera gear for some budget savings options.
- We have a guide to why you need a tripod, a guide to choosing a travel tripod, and a round-up of our favourite travel tripods
- You don’t want to lose all your photos. See our guide to backing up your photos for tips on keeping all your work safe.
- I have a guide to the best monitors for photo editing, as well as a guide to monitor calibration to ensure your screen is set up correctly.
- I have a guide to my favourite photo editing applications, as well as the best alternatives to Lightroom
- I have a guide to the best noise reduction software for some ideas on how to get the best out of your photos even when they might be a bit noisy
- We have a guide to how to use a compact camera, how to use a DSLR camera, and how to use a mirrorless camera. We also have a guide to how a DSLR works
- Knowing how to compose a great photo is a key photography skill. See our guide to composition in photography for lots of tips on this subject
- We have a guide to what depth of field is and when you would want to use it.
- We are big fans of getting the most out of your digital photo files, and do to that you will need to shoot in RAW. See our guide to RAW in photography to understand what RAW is, and why you should switch to RAW as soon as you can if your camera supports it.
- You’re going to need something to run your photo editing software on. See our guide to the best laptops for photo editing for some tips on what to look for.
- If you’re looking for more advice on specific tips for different scenarios, we also have you covered. See our guide to Northern Lights photography, long exposure photography, fireworks photography, tips for taking photos of stars, and cold weather photography.
- If you’re looking for a great gift for a photography loving friend or family member (or yourself!), take a look at our photography gift guide,
Looking to Improve Your Photography?
If you found this post helpful, and you want to improve your photography overall, you might want to check out my online travel photography course.
Since launching the course in 2016, I’ve already helped over 2,000 students learn how to take better photos. The course covers pretty much everything you need to know, from the basics of how a camera works, through to composition, light, and photo editing.
It also covers more advanced topics, including astrophotography, long exposure photography, flash photography, and HDR photography.
You get feedback from me as you progress, access to webinars, interviews and videos, as well as exclusive membership of a Facebook group where you can get feedback on your work and take part in regular challenges.
It’s available for an amazing one-off price for lifetime access, and I think you should check it out. Which you can do by clicking here.
And that’s it! I’d love to hear about your thoughts on challenges you’ve faced when traveling as a photography, and am happy to answer any questions you have. Just pop them in the comments below and I’ll get back to you as soon as I can.


More Stories
Why You Should Consider a Vacation to Jamaica
Delta SkyMiles Reserve American Express Card: Delta’s Most Valuable Airline Card
Must-see tourist places in London – Crazy sexy fun traveler